Halloween Thumbprint Sprinkle Cookies
Halloween is such a fun holiday. You can go spooky, you can go scary. It’s a great time to make some themed foods whether you’re having a party with friends or just having fun at home with your kids.
These Halloween sprinkle cookies are a perfect Halloween treat for kids or adults. They are a fun orange thumbprint cookie with a black center coated in spooky fun sprinkles.

This post contains affiliate links. If you make a purchase after clicking one of my links I may earn a commission at no additional cost to you.
Easy Halloween Cookies
These fun sprinkle thumbprint cookies are fun to look at and tasty too. Even my husband who’s more of a chocolate chip cookie fan thought these were good!
There are two options for the centers of these cookies. You can do the traditional thumbprint cookie by creating a depression and then filling it with chocolate ganache, dyed black for Halloween of course.
If you haven’t made thumbprint cookies before I recommend doing some test cookies first. It can take a bit to figure out how to make the depressions and you don’t want an entire tray of cookies to look wonky!
If you’re looking for an easier, faster method you can also use black candy melts for the center of these Halloween cookies.
Halloween Cookie Ingredients
Cookie Ingredients
- 2 1/4 cups flour
- 1 tsp baking powder
- 1/2 tsp salt
- 1 cup butter (2 sticks)
- 3/4 cup sugar
- 2 large egg yolks
- 1 tsp vanilla extract
- Halloween sprinkles
- Orange food coloring
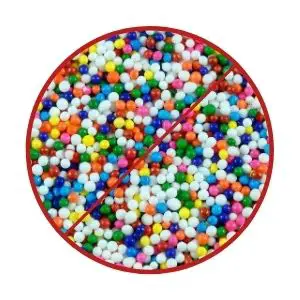
You’ll want to use larger sprinkles. DO NOT use the small round type known as nonpareils. These type are too small and will melt and burn upon baking.
Optional Ganache center ingredients
- 1 cup chocolate chips
- 1/2 cup heavy whipping cream
- Black food coloring
Optional Candy Melt center ingredients
- 1 bag black candy melts
How to make Halloween sprinkle cookies
1 – Preheat the oven to 350 degrees
2 – In a medium-sized bowl combine the dry ingredients; flour, baking powder, and salt.
3 – In a large bowl or stand mixer cream the butter and sugar together until it’s light and fluffy.
4 – Add in the egg yolks and vanilla, and orange food coloring and mix until well combined.
Your dough will lighten once you add the dry ingredients and lighten again upon baking so make sure it’s a nice darker shade of orange. (I used yellow and red dye to make orange as my set of colors did not include orange.)
5 – Add the dry ingredients in parts and mix until combined. (Add more orange food coloring if needed).
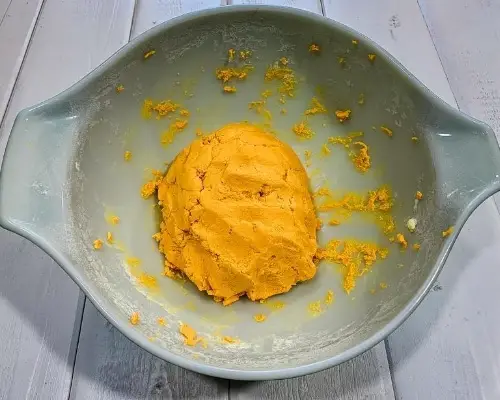
6 – Roll dough into a 1 inch balls.
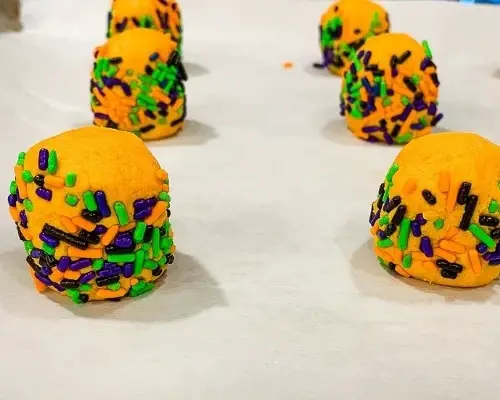
Pour sprinkles into a shallow plate or bowl and roll the dough in the sprinkles coating the middle area but leaving the top and bottom bare.
Again, do no use nonpareil type sprinkles. I used Halloween themed jimmies and Halloween shaped ones on mine. I also added some fun eyeball sprinkles to some!
Place upright on a baking sheet (covered with parchment paper or silicone baking mat).
7 – You have two options for the center of your cookies.
Option 1: Press 2 black candy melts together and then press them gently into the top of the cookie in the center.
This method is easier and faster.
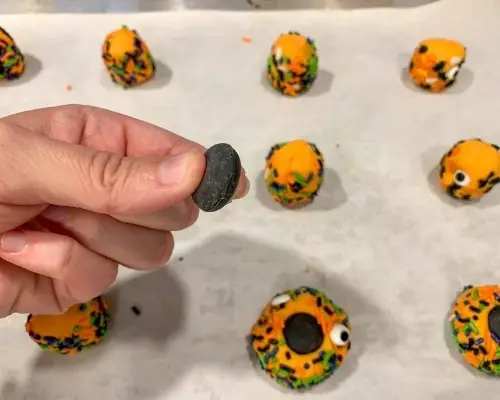
Option 2: Lightly flour the back of a rounded 1/2 tsp measuring spoon. Press gently into the top of the cookie in the center to create a depression. (This will be filled after baking).
This method will create a more traditional thumbprint cookie.
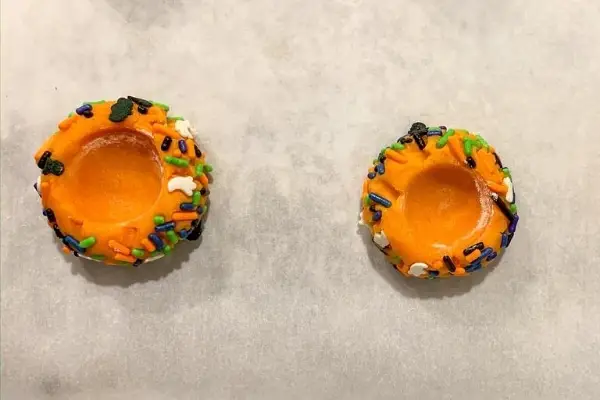
8 – Bake for approximately 20 minutes, until beginning to brown. Allow to cool a few minutes on the pan before transferring to a rack.
If you’re doing Option 1 then you are done! If you’re doing Option 2 you still have a little work to do.
9 – If doing Option 2: Allow cookies to cool before proceeding.
10 – Pour chocolate chips into a heat safe bowl.
11 – Warm heavy whipping cream on the stove in a small pot until it begins to steam (avoid boiling the cream or it may curdle!)
12 – Pour the cream over the chocolate chips and whisk together until well blended together.
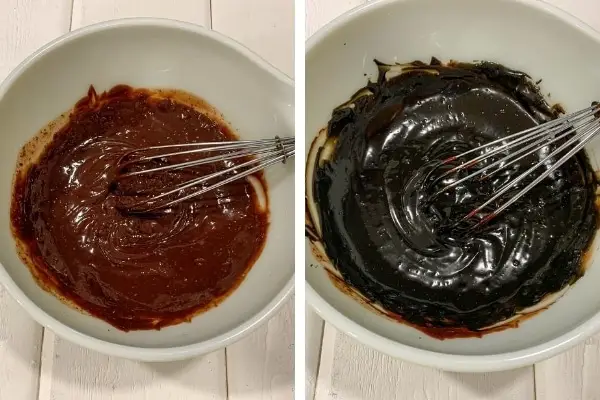
13 – Add a small amount of black food coloring and mix until you reach the desired darkness.
14 – Transfer to a ziploc bag or piping back. Snip the tip and pipe into the depression in each cookie.
Make one style or make both! Either one is a tasty Halloween treat.

Dough hard to work with?
If your dough seems too sticky you may have not added enough flour, your butter may have been extra soft, or it could just be an extra warm day!
Try refrigerating the dough for 15-30 minutes and then try again.
Follow us on Facebook or Instagram for more easy meal ideas and tag us with #easymommeals
Halloween thumbprint cookies
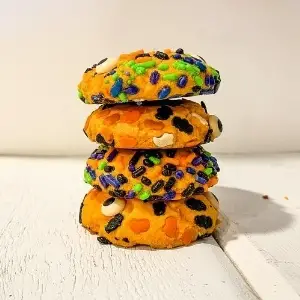
Spooky fun Halloween sprinkle thumbprint cookies! Make with candy melts or chocolate ganache.
Ingredients
- 2 1/4 cups flour
- 1 tsp baking powder
- 1/2 tsp salt
- 1 cup butter (2 sticks)
- 3/4 cup sugar
- 2 large egg yolks
- 1 tsp vanilla extract
- Halloween sprinkles
- Orange food coloring
Optional Ganache
- 1 cup chocolate chips
- 1/2 cup heavy whipping cream
- Black food coloring
Optional
- 1 bag black candy melts
Instructions
- Preheat the oven to 350 degrees
- In a medium-sized bowl combine the flour, baking powder, and salt.
- In a large bowl or stand mixer cream the butter and sugar together until it's light and fluffy.
- Add the egg yolks and vanilla, and orange food coloring and mix until well combined. You'll want it a darker orange as it will lighten upon adding the dry ingredients and more upon baking.
- Add the dry ingredients in parts and mix until combined. (Add more orange food coloring if needed)
- Roll dough into a 1 inch balls.
- Pour sprinkles into a shallow plate or bowl.
- Roll the dough in the sprinkles coating the middle area but leaving the top and bottom bare.
- Place upright on a baking sheet (covered with parchment paper or silicone baking mat).
- You have two options for the center.
- Option 1: Press 2 black candy melts together and then press them gently into the top of the cookie in the center.
- Option 2: Lightly flour the back of a rounded 1/2 tsp measuring spoon. Press gently into the top of the cookie in the center to create a depression. (This will be filled after baking).
- Bake for approximately 20 minutes, until beginning to brown.
- Allow to cool a few minutes on the pan before transferring to a rack.
- If doing Option 2: Allow cookies to cool before proceeding.
- Pour chocolate chips into a heat safe bowl.
- Warm heavy whipping cream on the stove in a small pot until it begins to steam (avoid boiling or it may curdle).
- Pour over the chocolate chips and whisk together until well blended together.
- Add a small amount of black food coloring and mix until you reach the desired darkness.
- Transfer to a ziploc bag or piping back. Snip the tip and pipe into the depression in each cookie.
Notes
Don't use small round sprinkles, they will melt and burn upon baking.

 Skip to Content
